DIY 6-Pointed 3D Snowflake
December 7, 2016
Check out these directions for a new take on a paper snowflake. These snowflakes take only minutes to make and can easily be made in different colors and sizes.
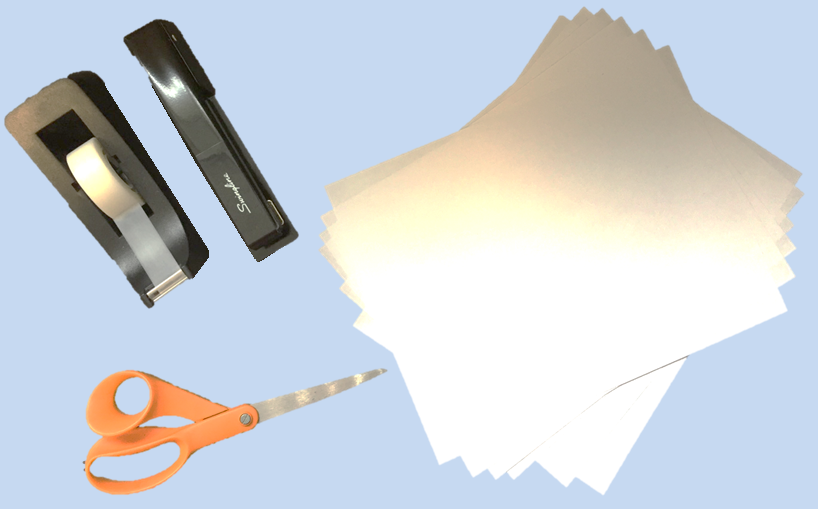
What You'll Need
- Stapler
- Tape
- Scissors
- 6 Sheets of Paper
Instructions
|
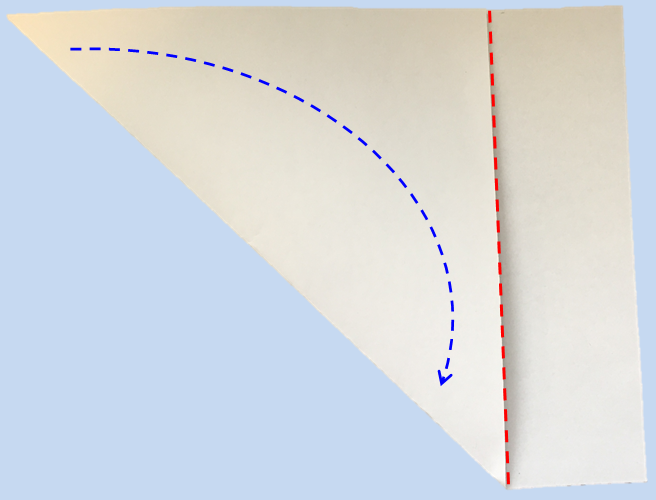
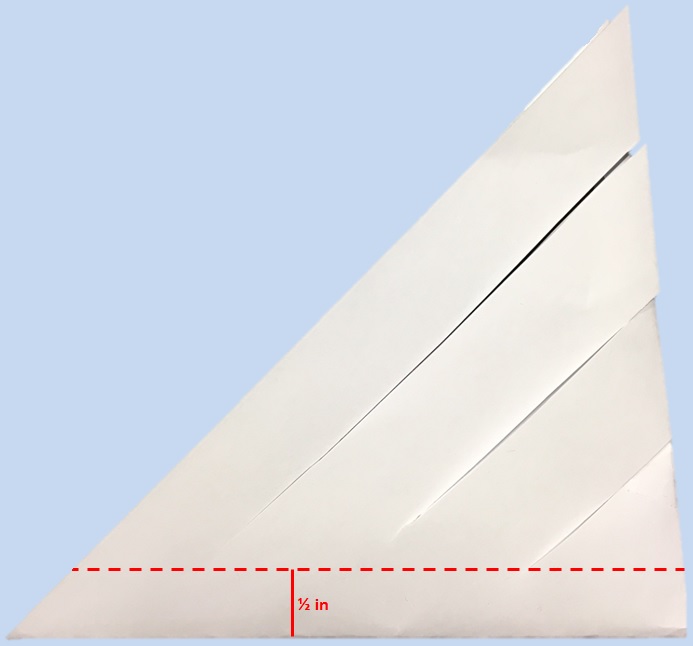
Step 1: Cut
Fold one corner of the paper in and cut the excess to make a square. With the square still folded, fold the paper again lengthwise to make a smaller triangle. Make three cuts parallel to the hypotenuse of your triangle. Each cut should be about 1 inch apart from the next, and each cut should end about ½ and inch from the other side of the triangle.
|
|
|
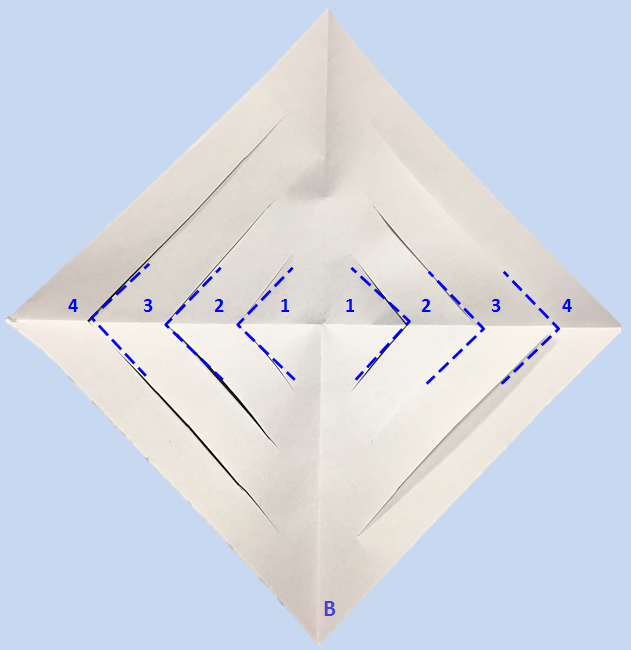
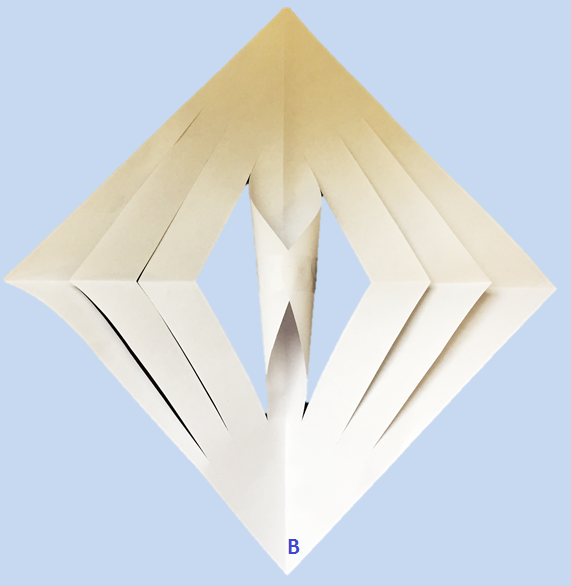
Step 2: Fold and Tape
Unfold your paper so that it is once again a square. Position the paper in front of you so that the corners of the cuts face left and right. Mark the bottom of the paper with a dot or a B. Pick up the two cuts labeled 1. Roll them towards each other and tape together. Repeat for the folds labeled 3. Turn the project over repeat with folds 2 and 4.
|
|
|
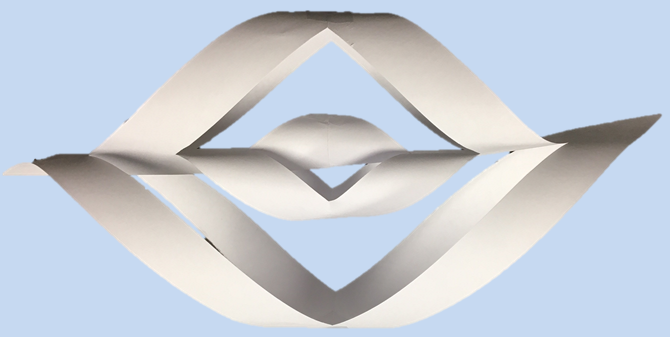
Step 3: Repeat
Repeat steps 1 and 2 for all six pieces of paper. Make sure to roll the corners in the same direction for every piece of paper. You now have all 6 arms of your snowflake. They should each look like the picture to the right.
|
|
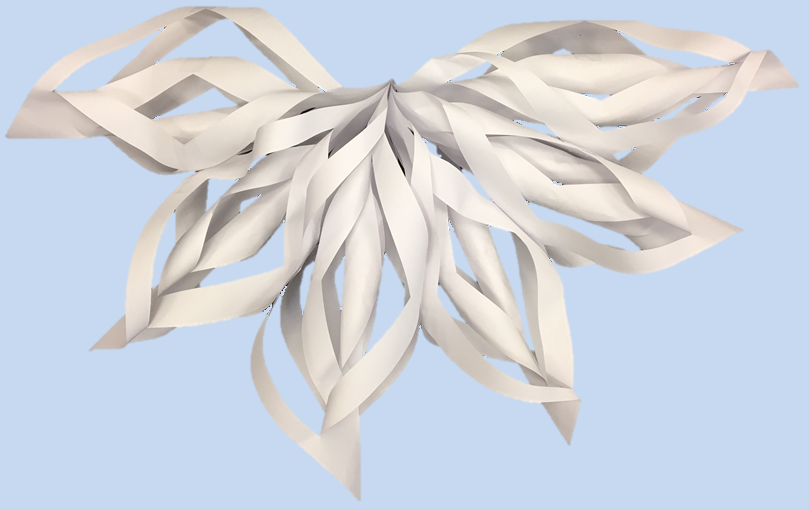
Step 4: Hold and Staple
Hold all the snowflakes by their bottom corner such that all the Bs face the same direction. Staple all 6 pages together near the B.
|
|
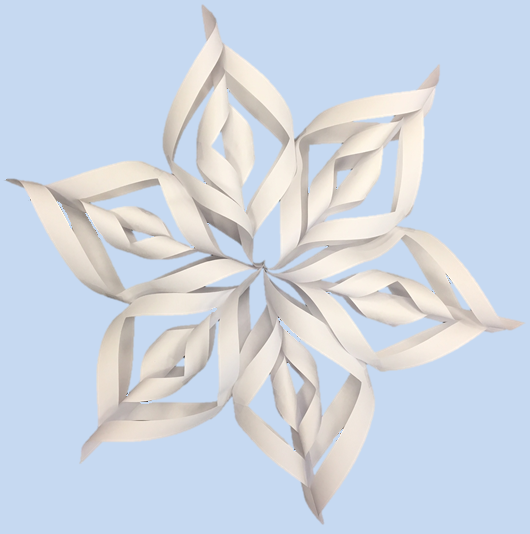
Step 5: Staple to Stabilize
This is where it gets a little tricky. Lay out your snowflake and arrange the arms as you would like. You will want to staple each arm to its neighbor, however, a staple in the center of each roll may not work. Find the spot where each arm aligns with its neighbor, even if its just a small overlap, place the staple in that location in order to keep your snowflake flat.
Step 6: Hole Punch and Hang
Lastly, punch a hole in the top of the snowflake. Use a piece of yarn or string to hang.
|
Make this decoration extra special by adding some color. Alternate arms of different color pieces of paper. You can even make your own design! Once you have a square piece of paper, draw your favorite design on one side - polka dots, candy cane stripes, rainbows ... whatever you like! Then follow the rest of the directions for a colorful snowflake. Alternatively, try using some wrapping paper. Often wrapping paper is colorful on one side and white on the other. This creates a two-tone effect for each arm of the snowflake!
Have feedback or questions about this article? Click here to send us your thoughts.
|

