DIY Paper Lantern Snowman
December 1, 2016
Do you want to build a snowman? (Come on, you know you channeled your inner Frozen and sang that like Anna) The temperature is dropping and Christmas will soon be here. Snuggle up inside by the fireplace, sip hot chocolate and do crafts with friends and family! Follow these step-by-step instructions on how to create snowman paper lantern. PartyCheap's White Paper Lantern Assortment allows you to make one snowman head and two full snowmen. If you only want to make heads, check out our pack of three paper lanterns.
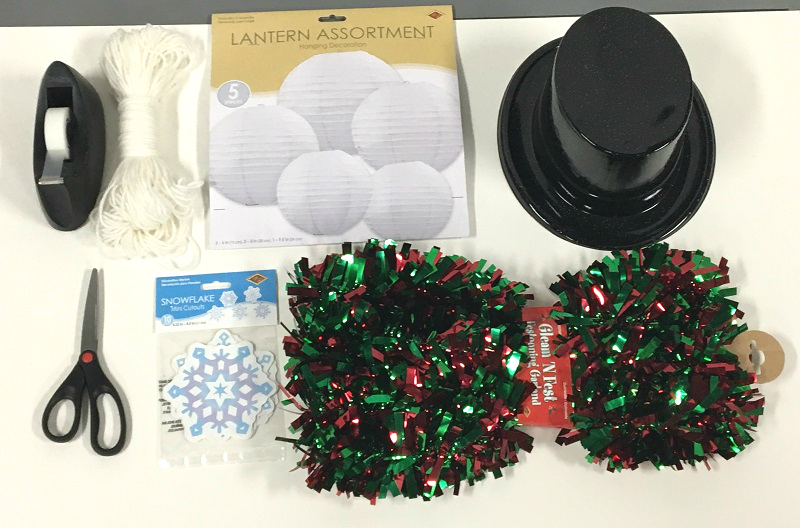
What Youll Need
Instructions
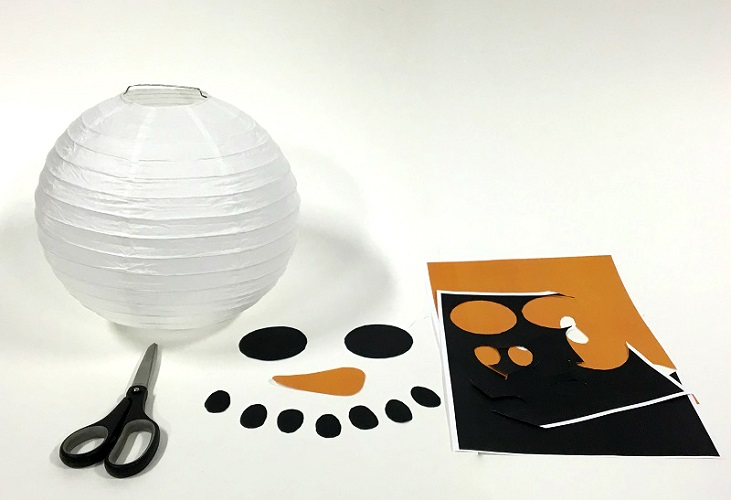
- Choose the largest white lantern from the assortment pack and assemble it.
-
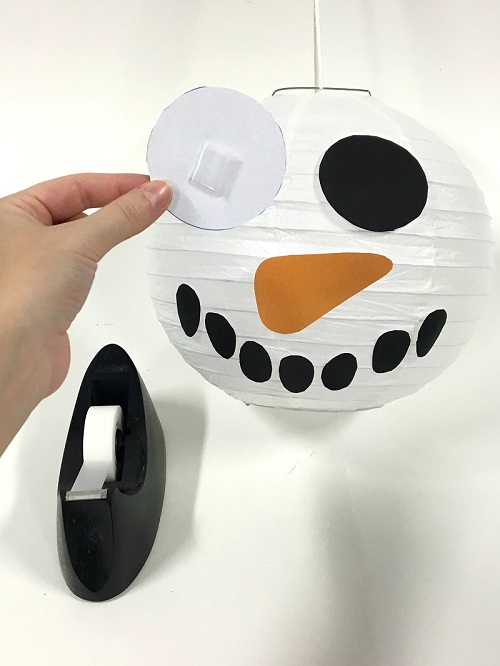
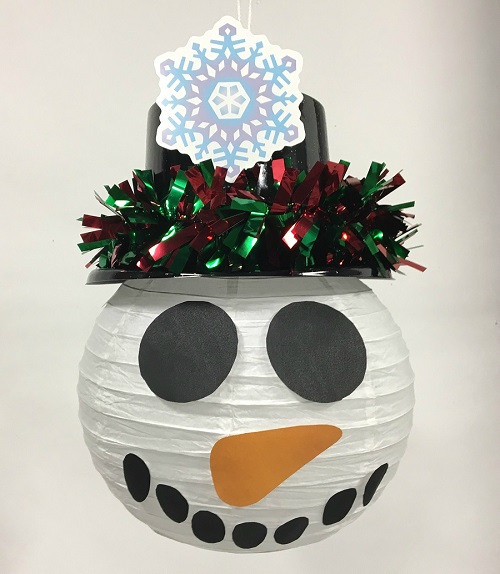
Cut out a nose and eyes and a mouth from the orange and black construction paper. Tape the face pieces to your lantern. Alternately you can use markers to draw directly on the lantern.
-
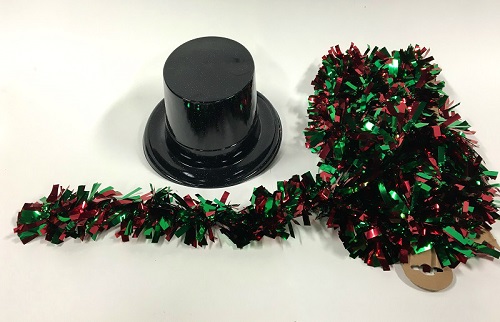
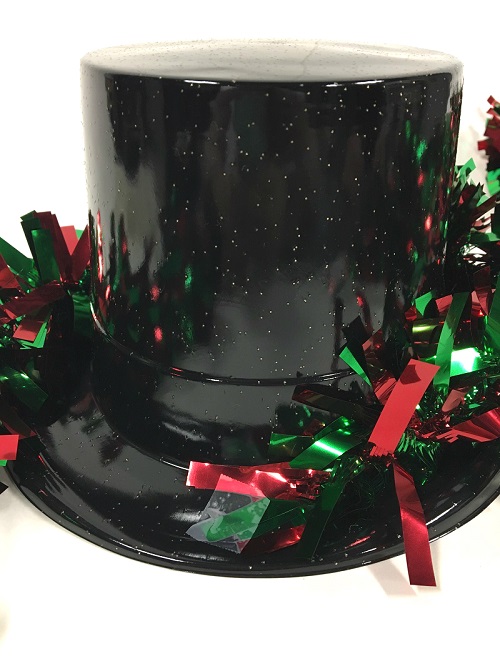
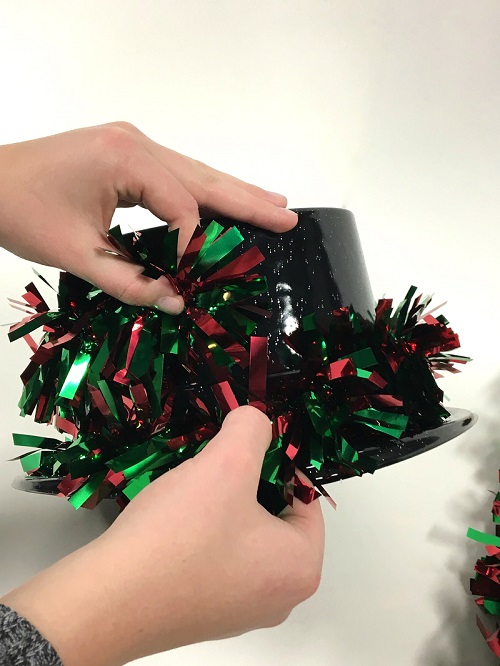
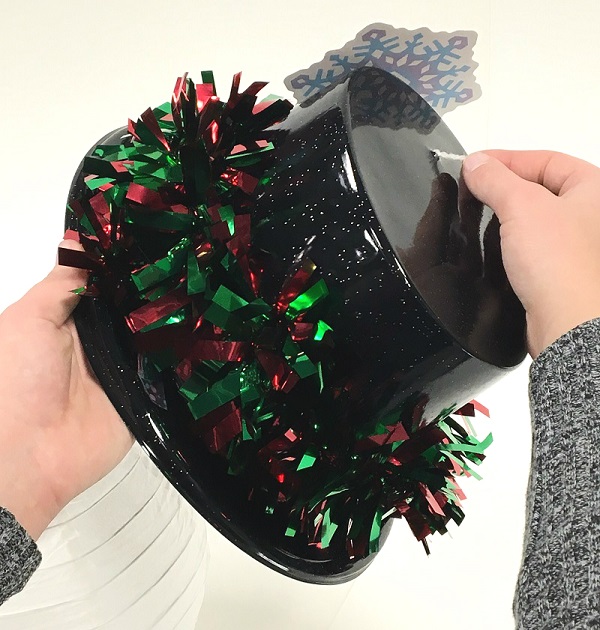
Pick your favorite Christmas Garland, and measure a length to fit around the base of the hat. Tape one end to the hat, wrap around and tuck the other end underneath. Use an additional piece of tape to secure the second end of the garland under.
-
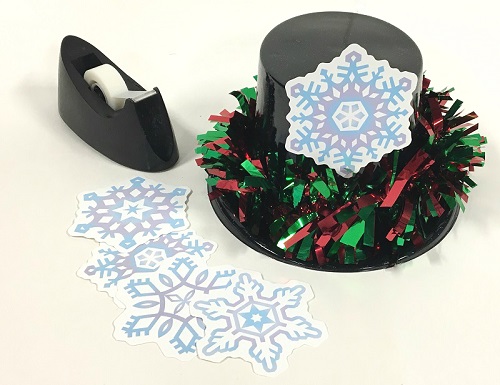
Tape your favorite Christmas cutout to the front of the hat above the garland.
-
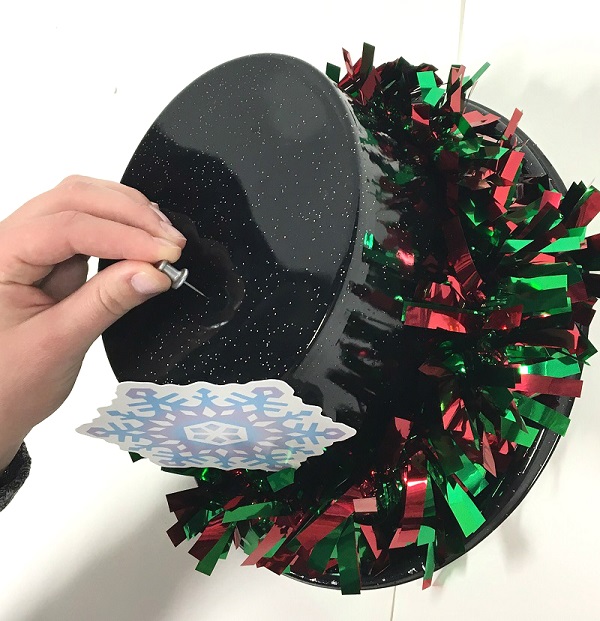
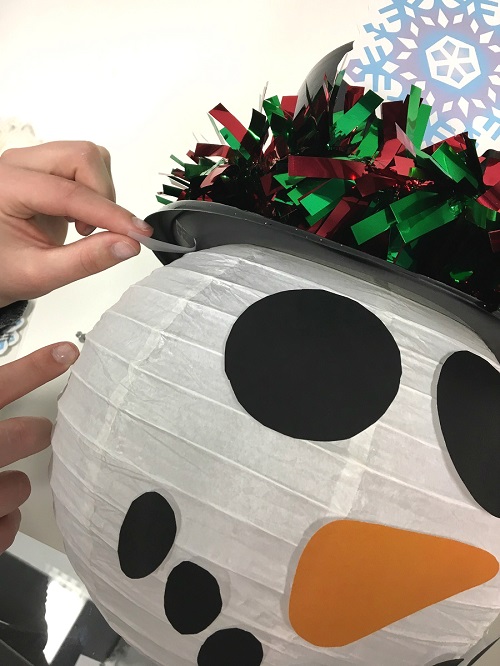
Using a pushpin or needle, make a hole in the top hat towards the front center of the hat. The size of the hole depends on the string you use. We used yarn, so we used a screwdriver to make the hole a little wider.
-
Cut a piece of string to your desired length. Wrap it around the hook at the top of the lantern. Then insert the string through the hole in the hat.
-
For extra security tape the inner brim of the hat to the top of the snowman head.
-
Hang your snowman lantern in your desired location for all to see!
If you would like a more permanent hold on your snowman, you can use glue instead of tape. To make a full snowman, make head as described above with the smallest size lantern, but do not make the hat. 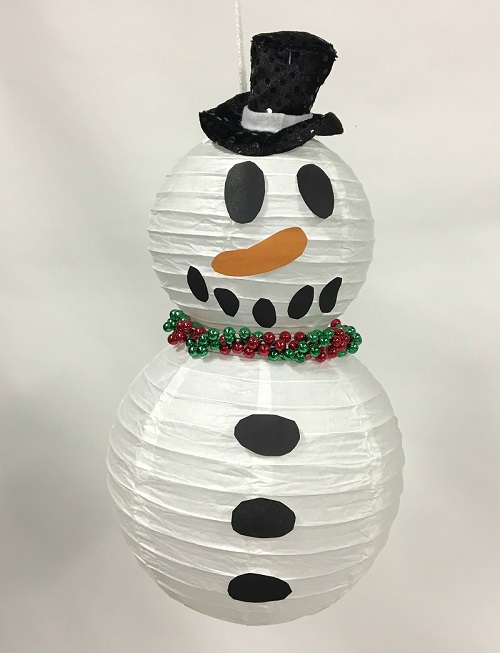
- Cut a few extra circles out of your black construction paper for buttons. Use tape to attach these to the bottom (middle size) lantern.
- Attach the hook from the bottom lantern to the bar (bottom) of the small lantern. If your hand is small enough to fit inside the lantern, use tape on the inside to secure the two lanterns together. If you cant get inside the lantern, a small piece of tape on the outside will work and does not intrude on the design.
- To add a little color, give this snowman a scarf. Twist two strings of beads together and secure at the back of the snowman with a twist-tie.
- You will need a smaller hat for this lantern, so you can fashion out of construction paper as well. We used this Black Top Hat Hair Clip for our little snowman. If you choose to use the clip, place it on the front lip of the head lantern.
- Cut a piece of string to your desired length and tie it to the hook at the top of the head lantern. Hang this snowman up so your snowman head has a buddy!
Have feedback or questions about this article? Click here to send us your thoughts.
Shop products used in this DIY
|
|